Thursday, July 23, 2015

Classic Toor Dal - Everyday Indian Food

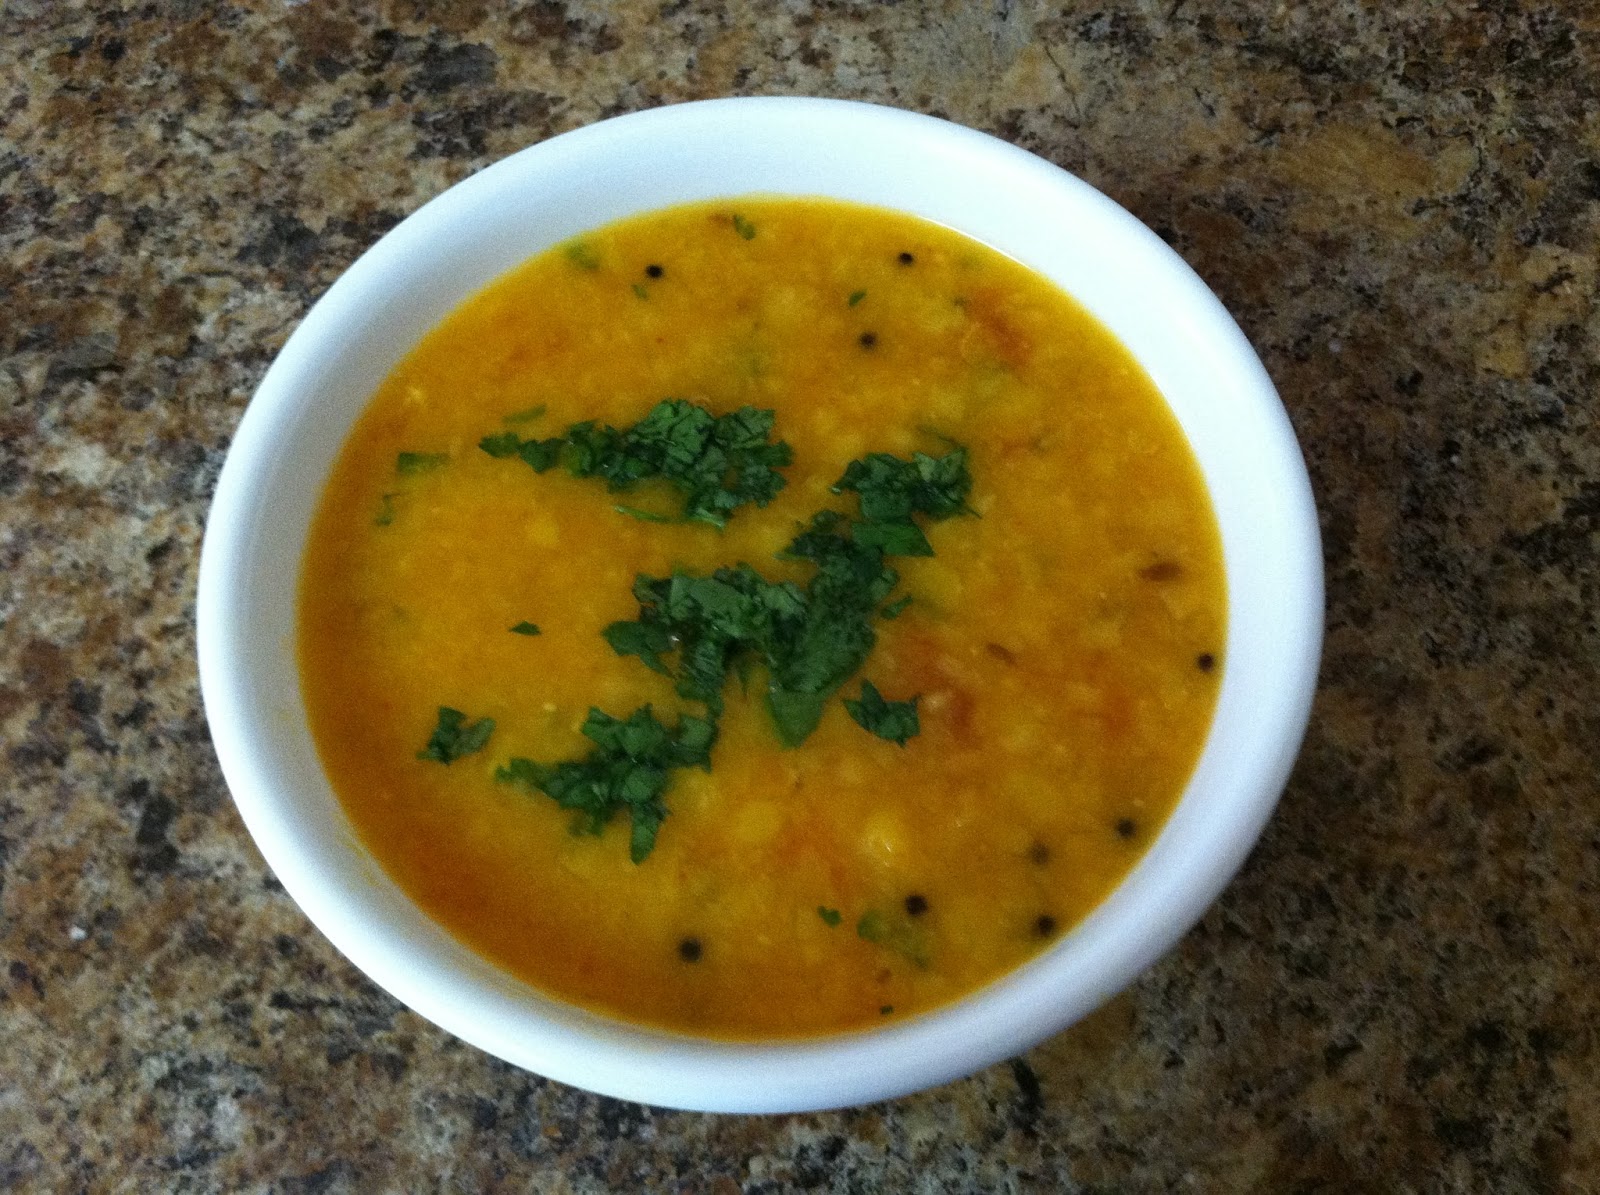
Lately, I've had quite a few people asking me for "Indian lentil recipes."  So I thought I'd write up our staple dal recipe that we eat at least once every few weeks.  Toor dal is Marathi for pigeon pea, a lovely member of the legume family.  The variety we make is yellow in color.  There are some things that I always love and never get sick of, and one of them is this recipe.  It's kind of like the American equivalent to mac and cheese, or the British equivalent to a jacket potato - comfort food all the way. 

Toor Dal
Makes 8 servings

Ingredients
2 cups thoroughly washed toor dal
3/4 tsp turmeric powder
1/2 tsp cayenne powder
1 tbsp canola oil, vegetable oil or ghee (clarified butter)
3/4 tsp mustard seeds
1/2 tsp cumin seeds
Pinch hing (asafoetida)
6 garlic cloves, thinly sliced
1 tsp salt
6 plum tomatoes, peeled and diced
5 cups of water
Juice of 1 lime or lemon
1 handful of cilantro leaves, finely chopped

Directions - Indian style pressure cooker 
*Please only use this method if your pressure cooker is safe to use to cook beans/lentils/legumes.  Check your pressure cooker instruction manual for guidelines. 
1.  Soak toor dal in 5 cups of water for a few hours.  This step is not essential but it speeds up cooking times dramatically.
2.  Heat oil in the pressure cooker.
3.  Add mustard seeds and listen for them to start popping.  Then add cumin seeds and the pinch of hing.  Allow these spices to sizzle in the oil for a moment until they smell aromatic.
4.  Add the garlic.  Stir, allowing to cook without browning for 1 minute.
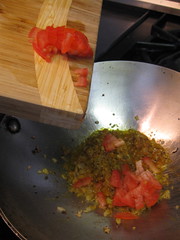
5.  Add tomatoes, turmeric powder, cayenne powder and salt.  Allow this entire mixture to cook for a few minutes, stirring occasionally, until tomatoes look slightly softened.
6.  Add the toor dal and all the water; stir.  Close the pressure cooker lid.  On a medium heat, cook and listen for 3 whistles.  Turn off. 
7.  Once the pressure has subsided, open lid, and add citrus juice and cilantro.  Taste for salt and sourness, which can be adjusted by adding more salt and more citrus. 

Directions - without pressure cooker
1.  Soak toor dal in 5 cups of water for a few hours.  This step is not essential but it speeds up cooking times dramatically.
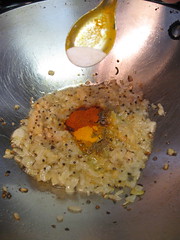
2.  Combine toor dal, water, cayenne powder, turmeric powder and salt in a pot and bring to a boil.  Skim the froth that has risen to the top.  Allow to simmer, stirring occasionally until toor dal is cooked.  During cooking, add water if necessary.  Do not cover the pot at any point.  Giving an estimate on time is difficult as toor dal can vary based on the variety/where it was grown etc.  It will probably take somewhere between 45 minutes and 2 hours.  When it is cooked, it will break apart, taking on a more creamy texture, and each piece can be very easily crushed with the back of a spoon.
3.  In a separate small pan, heat the oil.  
3.  Add mustard seeds and listen for them to start popping.  Then add cumin seeds and the pinch of hing.  Allow these spices to sizzle in the oil for a moment until they smell aromatic.
4.  Add the garlic.  Stir, allowing to cook without browning for 1 minute.
5.  Add tomatoes, turmeric powder, cayenne powder and salt.  Allow this entire mixture to cook for a few minutes, stirring occasionally. 
6.  Add this entire mixture to the pot with the dal in it, along with the citrus juice and cilantro.  Taste for salt and sourness, and adjust if necessary.
Wednesday, June 3, 2015

Cauliflower Bhaji/Indian Style Cauliflower and Potato


This recipe is delicious.  It was given to me by an excellent cook that I regard highly.  If you want to re-create the Indian restaurant experience in your own home, give this recipe a try.  It does not disappoint.  Keep in mind, if you are using a large cauliflower, you'll need to up the amount of each spice slightly. 

Cauliflower Bhaji
Makes 4 side dish sized servings

Ingredients
 
One small head of cauliflower, about 1.5 quarts, chopped into even, bite-sized pieces
One medium sized potato, peeled, cooked and chopped into small chunks
1 tbsp canola oil
A pinch of asafoetida (hing)
1/4 tsp turmeric
1/2 tsp cumin seeds
1/2 tsp coriander powder
1/4 tsp cayenne powder (or to taste)
1/2 tsp amchoor
1/8 tsp garam masala
1/2 tsp salt
A small handful cilantro leaves, finely chopped

Directions

1.  Cook the cauliflower pieces.  This can be done by steaming, boiling, or microwaving.  I'm usually in a rush and often end up microwaving as it only takes about 3-4 minutes to cook the pieces.  The ideal "cooked" cauliflower piece is tender but still has a bite to it.   Play around with this to get it right - it will depend on different factors, for example, how powerful the microwave is, or how large or small one considers "bite-sized" to be.

2.  Heat the oil in a wide bottomed pan.  Add the cumin seeds and allow them to sizzle and become aromatic.  Add the turmeric and asafoetida. 
3.  Immediately add the cooked cauilflower pieces and cooked potato chunks.  Stir until spices evenly cover cauliflower and potato.
4.  Sprinkle evenly over the mixture - coriander powder, cayenne powder, amchoor, garam masala and salt.  Stir thoroughly over the heat until well combined.
5.  Add the cilantro and stir until evenly distributed.  Serve!

Saturday, March 28, 2015

Sabudana Khichdi - Indian Style Tapioca with Peanuts and Potatoes


This recipe is a lovely mix of flavors and textures.  There is the chewiness of the tapioca, the bite of the crunchy peanut pieces, the softness of the fluffy potato chunks, and the tangy and spicy flavors which surprisingly combine so well with the peanut taste.  This dish would normally be served for breakfast or as a snack in India.  Healthy - not so much.  It's a carbohydrate festival with a bit of protein from some peanuts.  Tasty and awesome as a treat - yes. 

Sabudana Khichdi
Makes 3-4 servings

Ingredients
1.5 cups pearl tapioca (measured before soaking)
2/3 cup peanuts, finely chopped
Potatoes equal in volume to soaked tapioca, cooked, peeled and gently crushed by hands into pieces
1-2 tbsp canola oil
2 small green chilis, finely chopped
1/2 tsp cumin seeds
1 tbsp sugar
3/4 tsp amchoor
Salt to taste (approximately 1 tsp- more or less depending on whether your peanuts are salted or not)
Small handful cilantro, finely chopped


Directions
1.  The tapioca should be soaked approximately 12 hours before it is cooked.  To soak the tapioca, first wash it a couple of times.  Then, place the tapioca in a bowl, and just cover it with water.  You should not be able to see additional water floating on top of the tapioca.  Cover the bowl.  Just before cooking, use hands to break apart the tapioca so that it is in individual little pearls.
2.  Heat the oil in a wide bottom pan.  Add cumin seeds and allow them to sizzle for a few seconds until they become aromatic.
3.  Add the green chilis, allowing them to sizzle in the oil for a few seconds.
4.  Add the peanuts.  Stir the mixture frequently and watch the peanuts froth and brown slightly.
5.  When the peanuts have reached a light golden color, add the potatoes.  Continue to stir frequently for a few minutes.  I like it when the potatoes and peanuts get slightly browned and look quite golden.
6.  Add the pearl tapioca, sugar, salt, and amchoor.  Stir until well combined.  At this point you can taste the mixture.  For more spiciness, add some red chili powder (cayenne pepper), and for more sour flavor, add more amchoor or a squeeze of lime. 
7.  Turn off the heat.  Add the cilantro and stir until well distributed.
8.  Serve immediately.  The more time the tapioca has to sit in a heated dish, the more it will start to stick together.  Not necessarily a bad thing, but it does make the texture significantly more chewy. 

Monday, February 17, 2014

Classic Ratatouille

One of my favorite dishes has got to be ratatouille.  It's nutritious and delicious - I usually serve it as a side dish to accompany a meal - think steak, roast chicken, a pork chop etc.  One of the best meals I have ever eaten in my life included ratatouille - I think I was 16 and in the south of France, eating lunch outside with some family friends on a gorgeous day.  My plate consisted of filet of beef with a dark mushroom jus and ratatouille, and it was just the right combination of savory flavors.

This recipe is very good and IS simple, but takes some time and patience.  The key is to saute the pepper, eggplant and courgette (zucchini)  all separately.  If you do this, your ratatouille will be one step above the masses.

Ratatouille
Makes 4 servings as a side

Ingredients
1 eggplant, cut into small cubes
1 courgette (zucchini), cut into small cubes
1 yellow or red pepper, cut into small cubes
1 medium onion, finely chopped
2 garlic cloves, peeled and gently broken open
1 can of tomato sauce (8oz) 
1/4 cup extra virgin olive oil
salt
pepper
few sprigs of fresh thyme

Method
1.  Heat 1 tbsp of olive oil in a shallow, wide pan
2.  Add eggplant and saute over medium heat, stirring frequently until fully cooked (approximately 10-15 minutes) then remove to a bowl - eggplant is cooked when it's completely soft and starting to brown slightly around the edges
3.  Repeat steps one and two with courgette and pepper, respectively - courgette and peppers take less time than eggplant - they will both start to look quite translucent and brown slightly around the edges when done
4.  In the empty pan, add a bit more olive oil if necessary
5.  Add onion and garlic, and saute until onion is soft
6.  Add tomato sauce and thyme, stirring in the pan for one to two minutes
7.  Add back pepper, courgette and eggplant to the pan
8.  Season with salt and pepper, and stir all together
9.  Cover with lid and simmer over a low heat for 10-20 minutes

Tuesday, December 31, 2013

Vegetable and Lentil Soup with an Exotic Twist


Thank you Vani Auntie for the most delicious of vegetable and lentil soups I have ever had!  Not only is this soup very tasty, it's also full of nutritious ingredients.  The lemon, cilantro, ginger and chilies really kick this soup up a notch.  It's also a soup that is great for any season.

I have found that these basic quantities of vegetables work well together but it's very possible to change amounts of each vegetable depending on your preferences.  


Vegetable and Lentil Soup
Makes approximately 8-10 servings

Ingredients
1/2 cup uncooked moong dahl, washed and soaked for 30 minutes
1 large potato peeled and cut into small cubes
1/2 sweet potato peeled and cut into small cubes
1 can of petite diced chopped tomatoes
1 small can of tomato sauce
1.5 cups shredded carrots
4 celery stalks, chopped
1 medium onion, chopped
1 jalapeno or 3-4 birds eye chillies, very finely chopped
2 tbsp ginger, grated
1 tsp black pepper
1 tbsp paprika
salt to taste
2 tbsp canola oil
2 tbsp butter
1 large handful of cilantro, finely chopped
Juice of one lime

Directions
1.  Heat canola oil in deep pan or, if you want to cook the soup quickly, a pressure cooker
2.  Add onions and chilis, sauteing for 3-4 minutes
3.  Add ginger stirring for 1 minute
4.  Add all other ingredients, except for celery, cilantro, lime, black pepper and butter
5.  Cook until lentils and vegetables are all tender
6.  Add the celery and cook for 30 more minutes (I like having the celery a little less cooked than the rest of the vegetables in order to provide a slightly crunchy texture in the soup,  but if you like everything soft, just add the celery when you add all of the other vegetables)
6.  Finish with cilantro, lime juice, pepper, and butter

Sunday, September 9, 2012

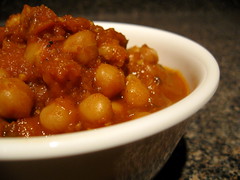
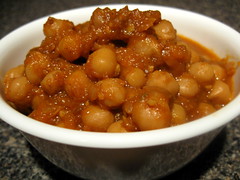
Indian Style Chick Peas

Thanks to Stuti Jhunjhunwala for teaching me how to make this staple Indian food!  Stuti has such a simple method for cooking this recipe, and its packed with tons of flavor! 

For anyone trying to learn some basic Indian recipes, I'd say this is a pretty good one to start with.  It doesn't require too many different ingredients and though it takes some time, the method is straightforward.  All you aspiring Indian chefs - be brave and give this recipe a try!

This recipe can be served with some sort of Indian bread (chapati, naan, paratha, puris, baturas etc.) or rice.  I like to scoop up the chick peas with a chapati instead of eating them with rice.  But that's of course, my personal opinion!

Indian Style Chick Peas
Makes approximately 8 servings as part of a meal

Ingredients
2 and 1/4 cups of dried chick peas, washed and soaked for 24hrs in water OR 3 15oz/425g cans of chick peas, drained and rinsed
1 tsp turmeric
1 tsp salt
1-2 tbsp canola or vegetable oil
1 tbsp cumin seeds
1 large onion
3 birds eye chilis (or some other medium hot chili, like a serrano pepper to taste)
6 cloves of garlic
2 tbsp grated ginger
3/4 can tomato paste (about 4.5oz)
2 tbsp MDH chana masala mix (available at most Indian supermarkets)
1/2 lemon or lime (optional)
More salt to taste

Directions
  1. After soaking the chick peas, cook them until tender with turmeric and salt (a pressure cooker is the fastest method if you have a pressure cooker that is safe for beans, or they can be simmered for 1-2hrs), OR, place drained and rinsed canned chick peas in a bowl with turmeric and salt. 
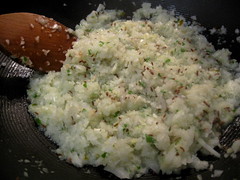
  2. Place onions, chilis and garlic into a chopper and process until they are very finely chopped.  If you don't have a chopper, use a large chef's knife to get to a finely chopped consistency.  
  3. Heat oil in a large non-stick pan.  Add cumin seeds and allow them to brown for a minute (they should sizzle a little and be fragrant).    

  1. Add the onions, chilis, garlic and ginger.  Allow them to cook until they are starting to brown and stick to the bottom of the pan (approximately 10-15 minutes on medium heat).  

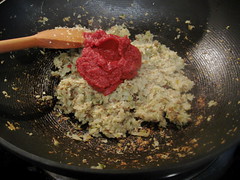
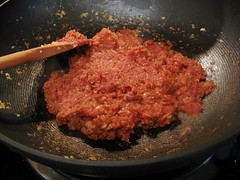
  1. Add the tomato paste.  Continually stir for approximately 3-4 minutes. 

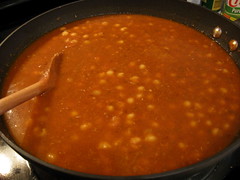
  1. Add the chick peas and the water they were cooked in, and the chana masala mix and stir well.  If you are using canned chick peas instead, add 2 cups of water to the pan.   

  1.  Simmer for approximately 30-45 minutes, until the sauce is nice and thick.  Adjust the spiciness with the lime or lemon juice, and adjust the salt according to taste.  


Monday, April 9, 2012

Kansas City's Best BBQ - Oklahoma Joe's

I know it's famous already, but I wanted to pay homage to Oklahoma Joe's.  I went there for my first time recently and it was a pretty unique experience.

The first thing to note about Oklahoma Joe's is that it's one of those places that is about the food, not the ambiance.
It's definitely a place where people come simply to chow down on delicious BBQ at a pretty reasonable price.  Oklahoma Joe's is self-serve, and plastic and paper plates all the way.  They do however give their customers real glasses to drink out of and real utensils to eat with.  Not that I needed utensils, but it's nice not to have to worry about prongs breaking off of a fork or  knife breaking in half.

The second thing to note about Oklahoma Joe's is that it is perhaps that most operationally efficient restaurant I have ever seen in my life.  Chipotle had previously earned that title with me, but after this experience everything changed.  There were perhaps 50 people in the line in front of us, 50 people behind us (who had all arrived there within 2 minutes of us), and we were served within 10 minutes!  I would not hesitate to compare the line with a symphony orchestra - once are order was taken at one end of the kitchen, we walked a few steps down the line to arrive at the end of the kitchen counter, to pick up our food and pay.  Everyone in the kitchen worked so harmoniously together that the food arrived at practically the exact moment we signed the credit card bill.  It was quite miraculous, and upon observing other people in the line it looked like they were continuously meeting this sparkling finale of exact precision.  Pretty awesome that not one customer had to wait around for their food! 

Finally, I should of course mention the food.  The ribs were awesome - lovely smokey flavor, tender, juicy and falling off the bone.  The french fries were great too because they were super hot and seasoned with seasoning salt which I think makes fries taste delicious.  Their pulled pork was pretty tasty too.  The beans and gumbo were okay, but not my favorite.  It's really about the pork at this place I think, and I sure ate plenty of it... all for the bargain price of about $10 per person, and that's with a beer too.  

If you are passing through Kansas City, don't miss this operational marvel and superb ribs.  It's worth a little detour.  The only question I am left with is wondering how many people they serve in a day - I bet it could easily be over 1000...

Thursday, March 15, 2012

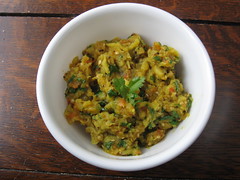
Shortcut Baingan Bharta (Indian Style Mashed Eggplant)

Thanks to my dad's patience and experimenting, he's come up with a way to make really good baingan bharta without all the fuss and effort usually required.  The only thing that is missing from this shortcut version is the smokey flavor that comes with roasting the eggplant over a flame, but to be honest, I actually like this version better because I think you can really taste all the delicious fresh ingredients that you can't in it's original form.

Baingan Bharta
Serves 3 people as a meal accompaniment 


Ingredients
1 eggplant
1/2 small onion, finely chopped
1 plum tomato, chopped
1 large handful of cilantro leaves, chopped
1 tbsp canola oil
1 tsp crushed garlic
1 tsp grated/ground ginger
3/4 tsp black mustard seeds
1 pinch hing (asafoetida) 
1/2 tsp cayenne powder (or more to desired spice level)
1/4 tsp turmeric
1/2 tsp cumin powder
1/2 tsp coriander powder
salt to taste

Directions
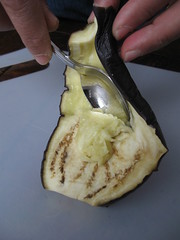
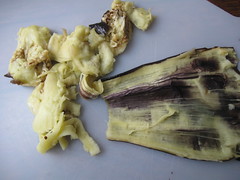
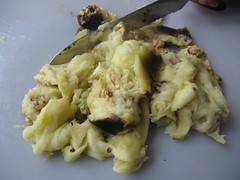
1.  Wash eggplant, cut into 2 or 4 pieces.  Place in microwave safe container with a few teaspoons of water and a lid.  Microwave until cooked, for approximately 12 minutes (more or less time depending on the strength of your microwave).  Remove the eggplant from the cooking container, allow to cool, and then peel.  Discard the skin.  Chop/crush the eggplant flesh and set aside. 

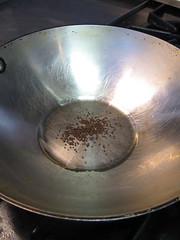
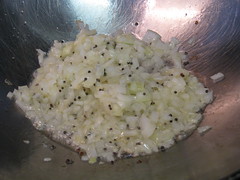
2. In a non-stick pan, heat canola oil.  Add mustard seeds and wait until they start to sizzle and pop.  Then add the pinch of hing, followed by the onions.

3.  Saute the onions until soft.  Then add the garlic, ginger, and all of the remaining spices.  Stir for a minute or two to avoid burning.

4.  Add the tomatoes.  Allow to cook for a couple of minutes until they start to break down.

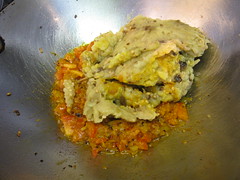
5.  Add the eggplant and make sure to combine all the ingredients together well.

6.  Add the cilantro.  Turn off the heat.  Stir the cilantro in well, and serve hot.  


Sunday, March 4, 2012

Food at the Oscars and Wolfgang Puck's Governors Ball

It was a once in a lifetime kind of occasion, that's for sure.  Unfortunately, it was a once in a lifetime occasion where cameras were prohibited.  I did however, have my phone with me, and managed to covertly snap a couple of not so excellent photos.  The light was dim throughout, so unfortunately I have not done any justice to the wonderful food.

Enjoying the red carpet
No longer the Kodak Theatre, but not enough time to change to it's new name before the ceremony day


Let me start by describing the ceremony itself.  All of us guests entered via the red carpet.  The only thing dividing us regular folk from the stars was a rope.  There was a lot of screaming from the grandstands when big stars entered, lots of networks doing interviews, and of course, lots of paparazzi.  The red carpet into the former Kodak Theater was pretty long, giving us a lot of time to soak in the atmosphere.  Upon ascending the sparkling staircase into the lobby of the theater, we were offered champagne.  There was champagne, more champagne, and seemingly more champagne, and yet interestingly a void of all other drinks, even water.

Ready to kick off the 2012 Oscars


After two hours of perusing the red carpet, brushing elbows with various celebrities, and enjoying the general hubbub of the paparazzi, we entered the theater and took our dress circle seats.  The show was run with ease and the atmosphere was generally relaxed - minus the few people always running back to their seats when the production announcer said, "Less than 30 seconds to air, ladies and gentleman PPPLLEEAASSEE take your seats!" 
Empty popcorn box from the ceremony and gold chocolate Oscar

About 2/3's of the way through the show they came around with little containers of popcorn.  Cute idea, but would have been nice if we would have also been offered some water!  Nevertheless it was a welcome treat after not having had anything to eat for hours.

The moment the show was over, everyone jumped out of their seats to either exit, or, if they were lucky enough to have a ticket, enter directly into the Governors Ball.  I was excited to attend the Governors Ball because my favorite kind of celebrity, the famous chef, Wolfgang Puck, was catering the party.

The Governors Ball


It turns out, that I didn't even get to sample all of the huge variety of items on offer.  Mini-dinner plates were served to us like appetizers.  There was lots of caviar, and lots of truffle flavored items.  There was comfort food (like chicken pot pie) and luxurious lobster.  There were adorable plates of beautifully presented mixed mini appetizers - mini potato latkes, crostini with prosciutto, miniature one-bite tacos and super tiny baby vegetables.  Baked potatoes were wrapped in gold foil and topped with mounds of sour cream and caviar.  Single racks of lamb were served with a delicate mint sauce and pea puree.  There were short ribs, pot stickers, sliders, and smoked salmon pizza too.  In the back of the room, there was a chocolate lovers dream; chocolate fountains, truffles, cookies etc.  And in the middle of the room, there was a giant, revolving band, led by Tony Bennett belting his heart out.

The thing that fascinated me most was how this event was made feasible.  Somehow, Wolfgang Puck managed to serve every dish warm to each of the 1500 guests.  To top that off, the food kept on coming, round after round, and hour after hour.  I'd loved to have viewed the behind the scenes kitchen to see they were operationally managing to make all this magic happen! 

One small section of the chocolate fountain bar
Passed mini-dessert plates, mini chocolate strobe light (on the left) included
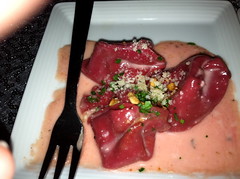
Red beet pasta, delicious!
Mac and Cheese topped with a giant piece of truffle


Memorable; yes.  Exciting; yes.  Once in a lifetime; yes.  Cross it off the bucket list; yes!

My apologies again for the terrible photo quality!!! I defer you all to Google Images (search: food at the Governors Ball) to see some really fantastic photos. 


Sunday, February 19, 2012

Aunt Thackray's Easy French Style Chicken Thighs

Home but don't want to spend time in the kitchen?  Try these easy to make chicken thighs.  I had these at our good family friends', the Seznec's, one summer evening with salad, crab cakes, asparagus and fresh bread.  Everything was seasoned delicately and was delicious!  Aunt Thackray's a native of the Maryland seashore, and her husband Uncle Jean-Francois, well, you guessed it, he's French.  Needless to say there was both Maryland seaside and French inspiration in our meal.  I enjoyed the entire meal, and later asked for a few of Aunt Thackray's recipes.  This chicken recipe seemed like the easiest one to try, and sure enough, it was a cinch.  My husband and I ate this chicken with a big salad with homemade vinaigrette dressing, but it would go nicely with other things such as zucchini and roast potatoes, or haricot verts and rice pilaf. 

French Style Chicken Thighs

Ingredients
Boneless, skinless chicken thighs
Olive oil
Salt
Pepper
Herbes de Provence (make sure there is thyme in the mixture you have or buy)


Directions
1.  Line a shallow baking dish with foil and pre-heat the oven to 350 degrees Fahrenheit
2.  Season the inside of the chicken thigh with salt, pepper and herbs
3.  Flip over and fold the ends in so that the (would be) skin side is facing up
4.  Drizzle olive oil over the top of the chicken
5.  Season top side with salt, pepper and herbs
6.  Place in baking dish, making sure there is space in between each chicken thigh
6.  Place in the oven, and cook for 1:45-2hrs, basting about every 20 minutes (cooking time will vary depending on reliability of your oven! You might only need to cook the chicken for 1hr and 15min, so please use your best judgement!)
7.  Chicken is ready when most of the chicken juice is gone and the chicken pieces are golden brown in color

Saturday, February 11, 2012

Classic Chicken Curry

Well, I finally learned how to make my Dad's beloved chicken curry.  A typical dish that my family would make, I've been enjoying this dish since as long as I can remember.  This is the real deal, no yucky "curry powder" (curry powder as most Americans and Brits know it has absolutely nothing to do with chicken curry by the way) and no shortcuts.  My Dad claims that the key to this recipe is browning the onions - if they are not browned properly, over a low heat and in plenty of oil for about 30 or 40 minutes, the dish won't have the same flavor depth.

So I take you back to my childhood... enjoy!

Chicken Curry
4 Dinner Servings

Ingredients
1 chicken, cut into ten pieces, and skin removed
4 medium onions, or 3 large onions
3 peeled and diced plum tomatoes, or one 14.5oz can of petite diced tomatoes, rinsed and squeezed dry
3 whole cloves
3 whole cardamon, broken open
1 inch of cinnamon stick
2 tbsp crushed/grated ginger
2 tbsp crushed garlic
1 tsp turmeric
1 tsp cumin powder
1 tsp coriander powder
1 tsp cayenne pepper (or to taste)
Salt to taste
Canola or vegetable oil
Boiling water
1-2 Peeled and quartered medium potatoes

Directions
1.  Heat canola oil in a non-stick pan.
2.  Add cloves, cardamon and cinnamon stick.  Allow to sizzle in the oil until the cloves double in size (about 1 minute).
3.  Add the onions.  Cook for low for approximately 30 minutes, stirring often.  If it seems like the onions are sticking and burning, add more canola oil.  Onions are ready when they are golden brown and separated from oil.

4.  Add the tomatoes.  Cook until the oil separates from the tomato and onion mixture.

5.  Add the garlic, ginger, turmeric, coriander, cumin and cayenne powders.  Stir well.


6.  Turn the heat up.  Add the chicken, allow the meat to seal on all sides (until no pink is showing).


7.  Add enough boiling water to just cover the chicken.  Bring to a boil and turn down to a low simmer.  Cover with lid. 
8.  Cook on low using one of two methods - cook the chicken breast until just cooked, removing from the pan and adding back when the legs are cooked - about 1.5hrs, or, cook all the chicken on low for 2-3hrs until the meat is falling off the bone.  Add the potatoes approximately 45 minutes before cooking time is completed. 

9.  Serve with basmati rice.